Wifi Lamp
This is a colorful lamp working on battery and cotrolled from a smartphone (or any android device) over wifi.
Principle of operation
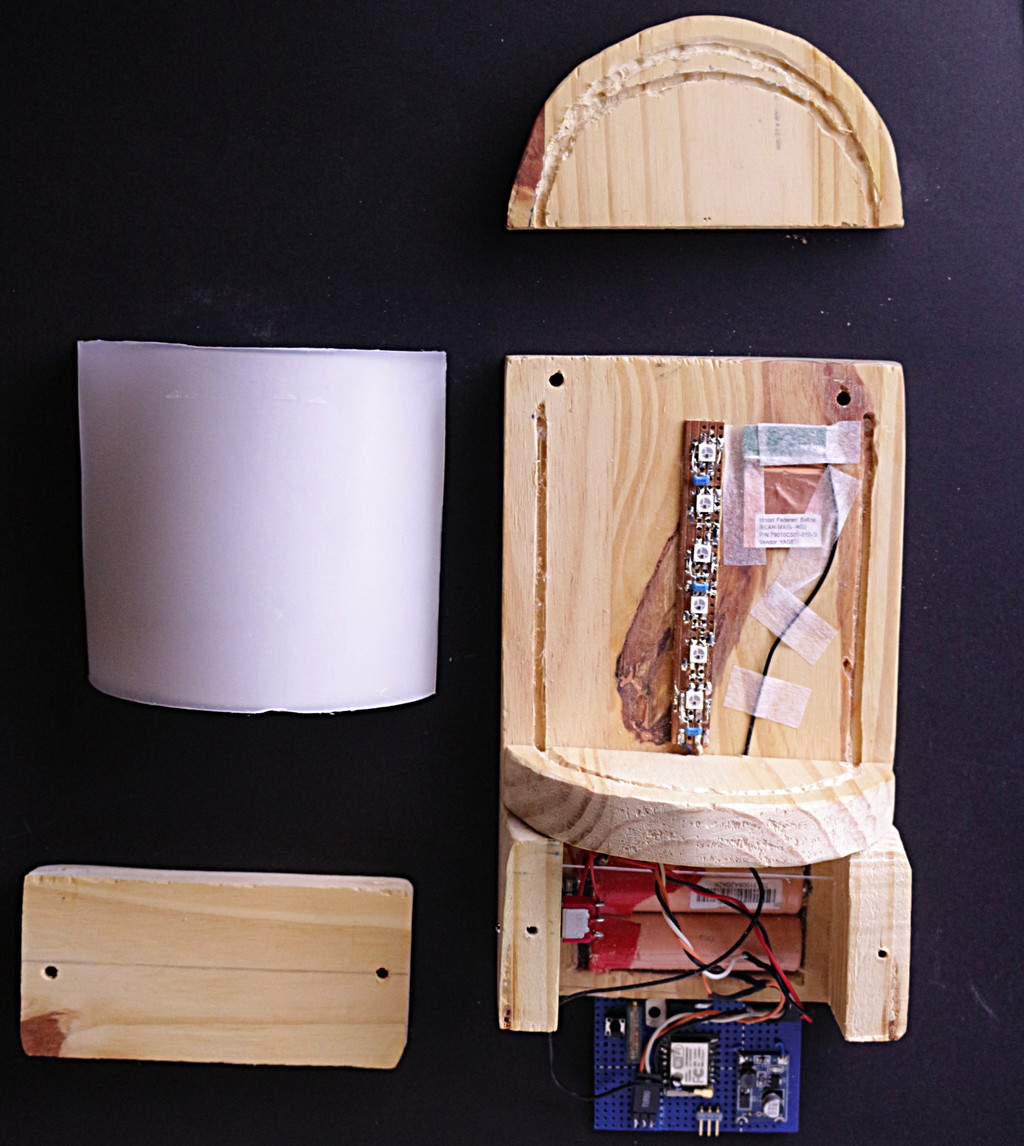
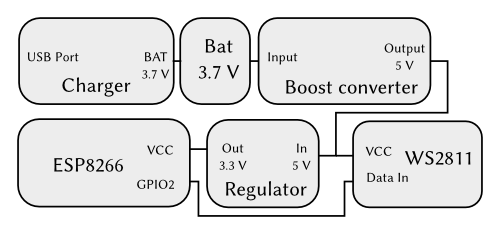
The lamp is powered by a lithium battery made of two cells scavanged from a laptop battery. It can be charged by a micro-usb port thanks to this charging circuit.
The voltage is then step up to 5 V with a boost converter to power the addresable rgb LEDs WS2811.
These 5 V are then regulated down to 3.3 V with a LM317 based circuit to power the ESP8266 which handles the communications and drives the LEDs.
ESP8266

This module was initially designed to provide a wifi connection to another microcontroller through a serial interface. But as it contains a microcontroller clocked at 80 MHz with a large flash memory (up to 4 Mo) it did not take too long for alternative firmware to be availlable.
For this project I used an ESP-07 module flashed with the NodeMCU firmware which make it easily programmable in LUA. The ESPlorer IDE makes the development even more easy.
The received signal level was so weak with the integrated antenna that it was almost unusable. Thus I added an external antenna scavanged from a dead laptop (fortunately the connectors are the same). The added antenna is the thing tapped next to the LEDs on the first picture above.
The firmware is quite simple. When the lamp is switched on, it tries to connect to an access point configured (in the config.lua file), if the connection is not successful after a few seconds, the lamp creates its own access point which permits its configuration.
Two servers are running simultaneously
- A TCP server listening on the 80 port and provides the configuration web page ;
- An UDP server listening on the 8888 port receiving the colors for the LEDs.

In order to change the colors of the LEDs, one just send an UDP packet containing the 18 bytes (rgbrgbrgb...) encoding the Red, Green and Blue values for each LED.
The http server is extremely basic, it answers to any request with the configuration page and handles the reception of the parameters. I used a part of nodemcu-httpserver by marcoskirsch.
Android ppplication
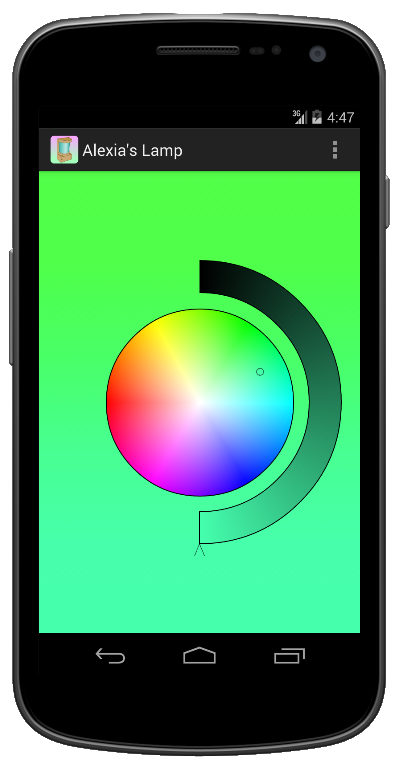
The control application is also very basic, the user selects the color of each LED by a touch on the colored circle. A swipe on the circle allows the selection of the same color for all the LEDs. I re-used the color picker by Chiral Code with a few slight modifications. The video below shown the application running.
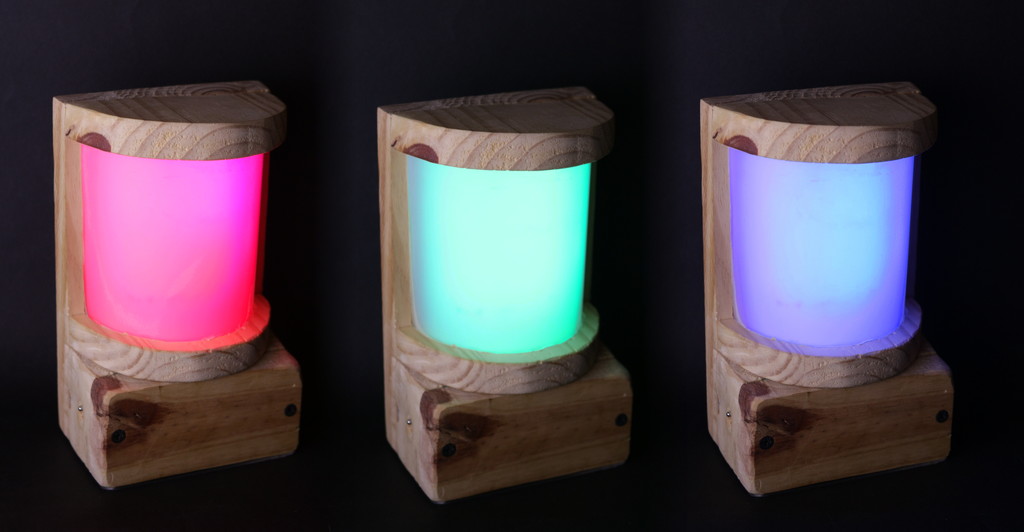
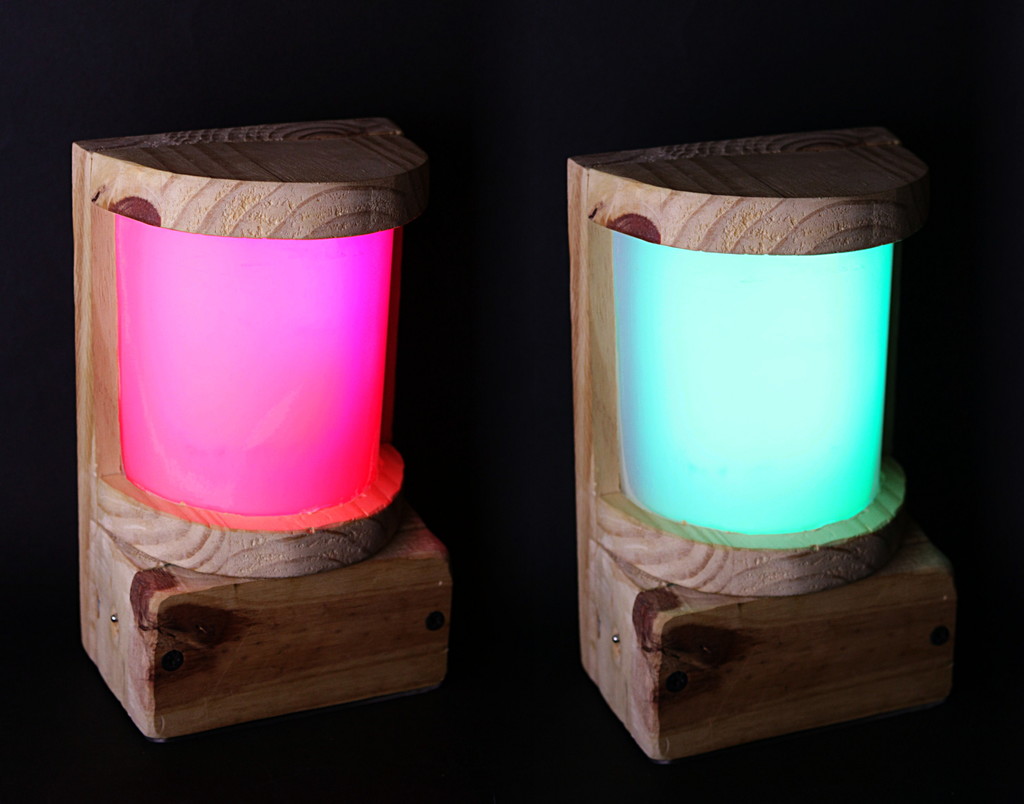
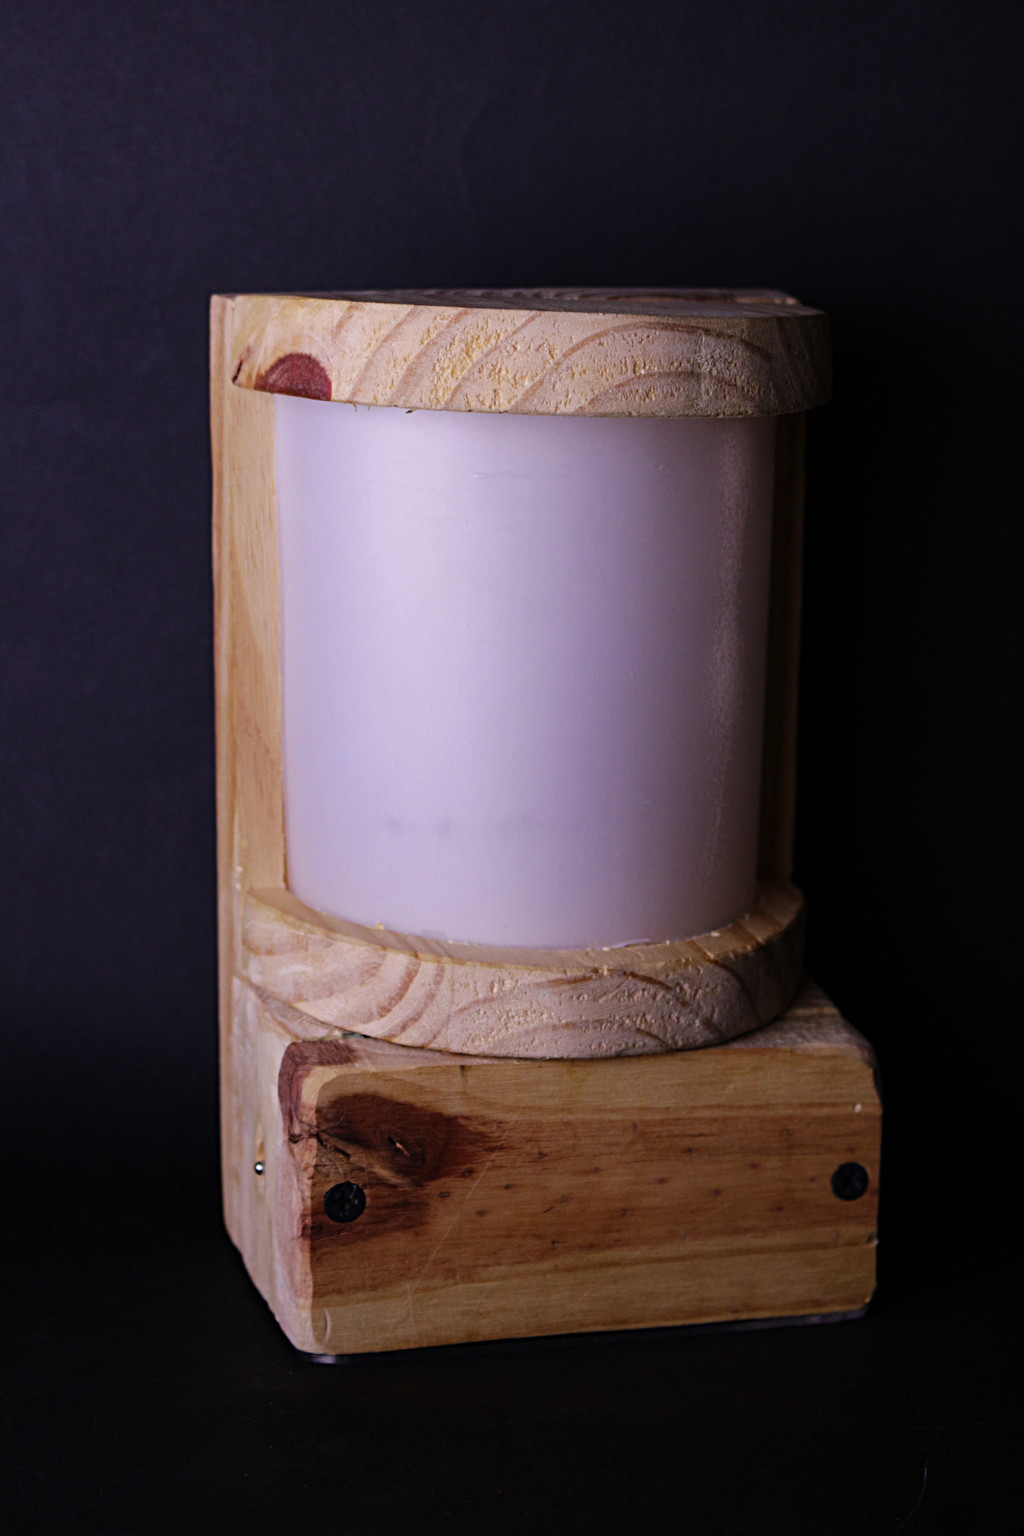
Pictures